
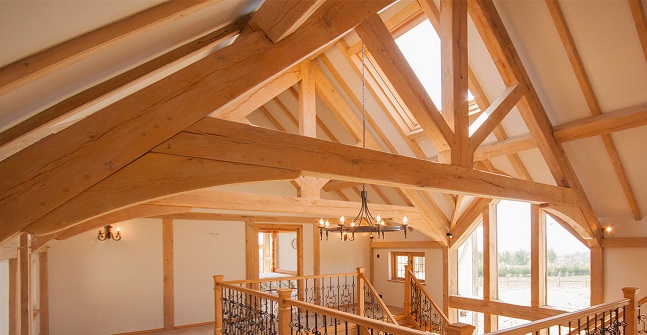
Removing the roof trusses is one of the time-consuming tasks in roof repair. Although you can DIY this task to save on labor costs, it will take you time to complete the entire process. For that reason, you might need to hire a reputable roofing contractor to help.
Although contractors will tell you that you can replace the damaged truss by removing the old truss first, the process will not be as easy as it sounds. You first need to remove everything else on the roof, which requires time and labor.
If you have trouble removing roof trusses yourself, worry no more. This guide will help you with the process, and you’ll also learn why roof trusses can fail sometimes.
Can You Cut Roof Trusses Instead Of Removing Them?
Since truss removal is complex, most homeowners take the shortcut and cut the trusses instead of entirely removing them. However, this is not advisable because the trusses perform a vital role in supporting the roof’s weight off the walls. Cutting the trusses or damaging them without replacing them can lead to a structural overload, weakening the walls and leading to accidents.
If some trusses are damaged or cut, contact roof masters by checking out https://www.roofmasterlubbock.com/ for professional assistance.
Reasons for Roof Truss Failure
Besides electrical and plumbing repairs, water can also cause roof damage. Wood is prone to moisture, and most roofs are made from wood. When exposed to water, wood absorbs the moisture and swells.
The soaked roof will start rotting slowly, which spreads fast to other parts. The rotting wood becomes weak, discolors, and reduces the home’s curb appeal. The rotting can also spread to the walls, and as such, cause further damage. Check out other reasons for your roof truss damage.
Water Leaks
The water leaks could be from pipes in the attic or rainwater penetrating through broken shingles. In addition, you will notice water leaks from discolored ceilings and roofs, or you could also see water drops falling from the top when it rains.
Older buildings are most affected because they have old shingles. The joint where the rafters sit on or in the walls could be an entry of water. You can treat the wood with boron-based preservatives to avoid more damages.
Insect Infestation
Besides water, wood is also affected by insects like termites. They eat the timber up, digging holes that are hard to repair. With the tie, the wood weakens and can fall, causing accidents.
Once you spot any signs of termite and other rodent infestation on the wood, you should treat the wood. Use boron-based preservatives to stop the insects from continuous damage. If it is too late to treat the damage, endeavor to replace the entire structure.
Joint Failure
Contractors use nail plates or plywood plasters fixed with nails, screws, and glue to connect joints in roofs. This is different from old roofs that were connected using Mortise and Tenon joints.
Woodworms quickly eat and destroy the old Mortise and Tenon joints, thereby opening the joints. The openings will lead to water leaks and expose the truss to other elements that lead to its failure.
Removing the Roof Trusses
Ensure you prepare all the tools needed for the task. Having them ready with you will make the work easier and faster. Also, ensure you have protective attire before climbing up the roof. The shoes should have a good grip to protect you from sliding.
Wear a helmet and a reflector jacket. Also, prepare the roof truss repair team with the new truss ready for installation. Failure to return the roof the same day could lead to damage to your bare roof.
Choose a less sunny and not rainy day. Working in the rain can cause slides leading to fatal accidents. Also, it is hard to work when the sun is too hot, so choose a calm day. Cold days could lead to snow on the roof, making it hard to work on.
Step 1. Remove the Roof
You have to remove the current roof and everything on top before getting to the truss. Use a hammer and crowbar to disable it. Remove all the shingles and collect them in a safe place if you are planning on returning them. Otherwise, dispose of it in a bin.
When removing the shingles and other roof materials, you can extend your demolishing to the truss to lessen the pressure on the truss for easier removal. Call a few other people to help with the tedious process.
Step 2. Remove the Roof Truss
Once the shingles are off the rooftop and the truss loosened, remove the wood truss. Cut through the metal brackets using a saw. Once all is loose, lower the truss to the ground. You can use other tools like a crane if the truss is too large.
You Can Repair the Roof Truss
Before any repairs, first, ensure to check the cause of the problem. Repairing the truss without first repairing its cause of damage will have you repairing the replacement one in a short while.
If the damage is due to water leaks, ensure you also identify the reason for the leaks. For example, repair the shingles that could be leading to rainwater leaks. Also, check any damaged pipes in the attic that could be causing leaks and repair.
Also, repair areas around the roof, like the brickwork and mortar joints leading to water leaks. Once you resolve the problems, you can remove the entire truss using the steps above. Also, ensure you have the replacement truss in place.
The cost of returning a truss can be high because most of the roof materials have come off. You will therefore incur labor costs for returning the shingles and the truss. It would be best if you also had more tools for installation like a crane, which can be expensive to hire.
Some homeowners remove the truss internally, but this is only possible with the type of roof. Also, if the entire roof is not damaged, you can do timber resin repairs to stop damages like insects and rot. This increases your trusses’ lifespan.
Final Words
Removing roof trusses is not a straightforward process, but it is all worth it. First, ensure you inspect the reason for the damage, remove the trusses and replace them. If you notice signs of damage, do not take chances and repair the roof if the damage is spread out.


